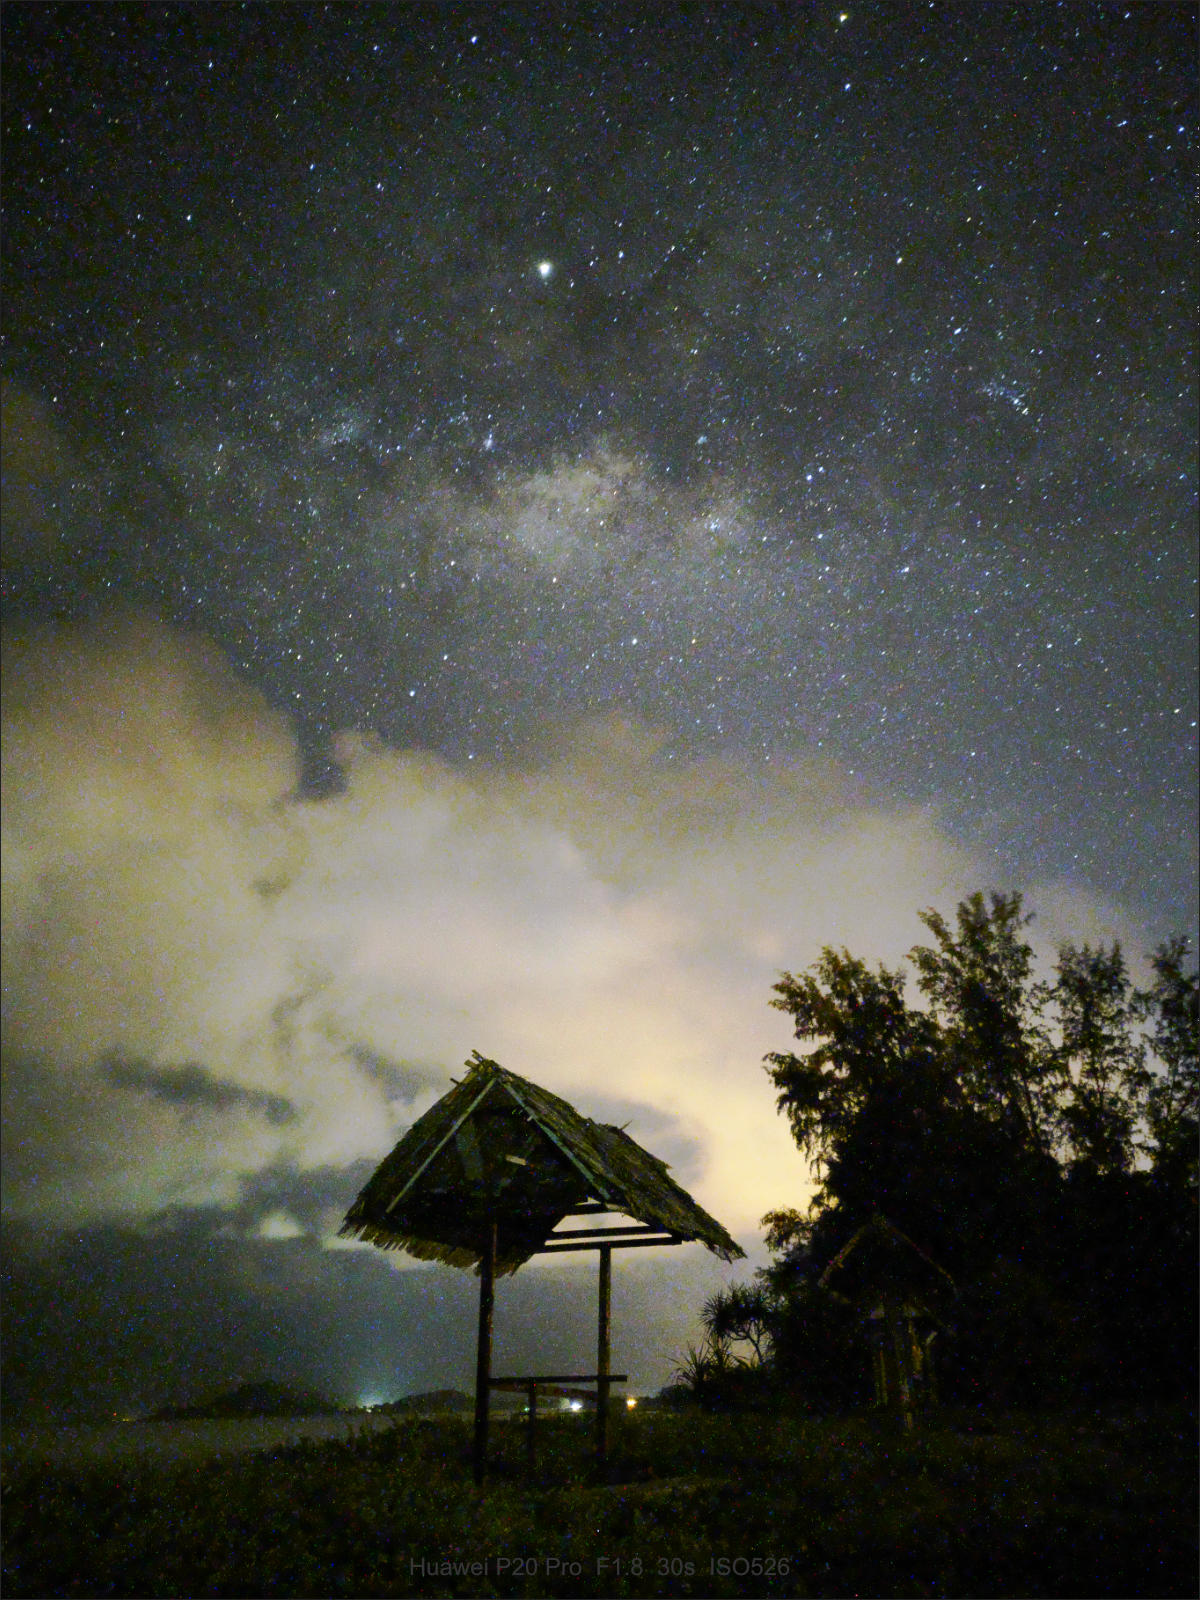
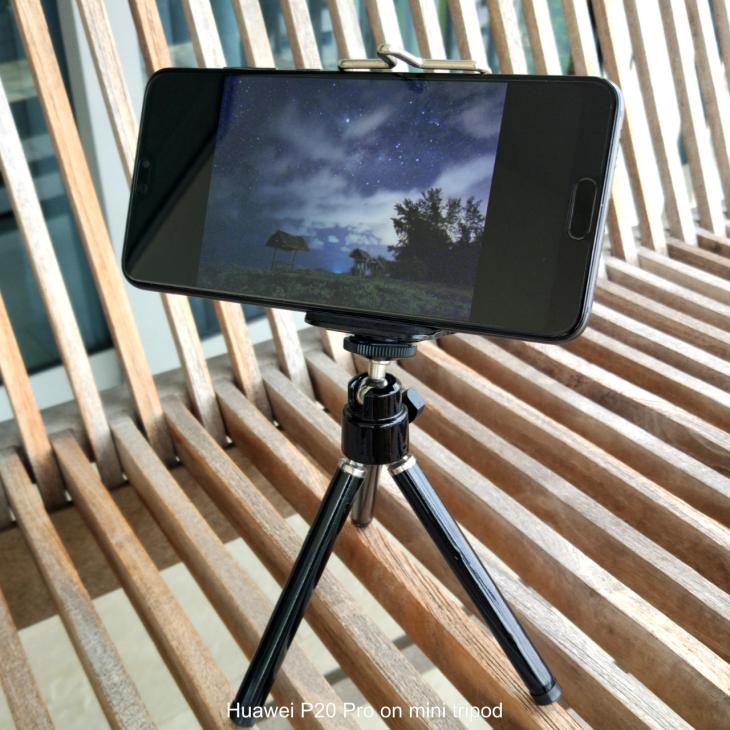
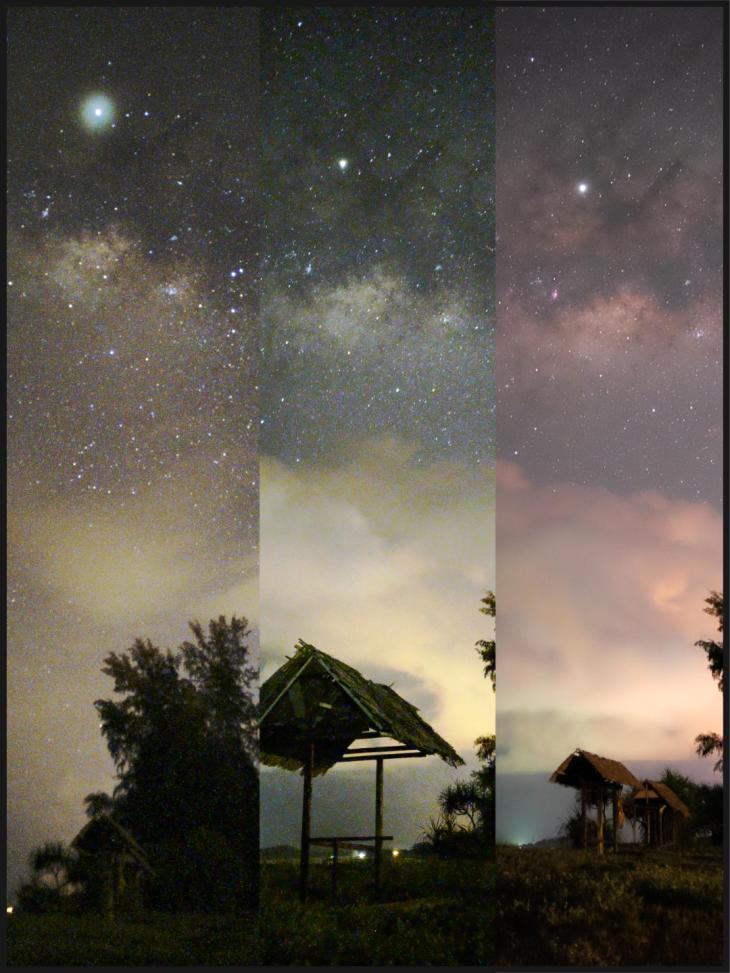
Earlier this year, in late April, I went shooting the Milky Way at Sri Kandi Resort, Mersing with a group of friends from Sabah Stargazers. However, the weather was not ideal and the sky was very cloudy so I decided to take time-lapse of the moving clouds instead. And while waiting for the clouds to clear, I set up a mini tripod to try shooting the Milky Way with the Huawei P20 Pro.
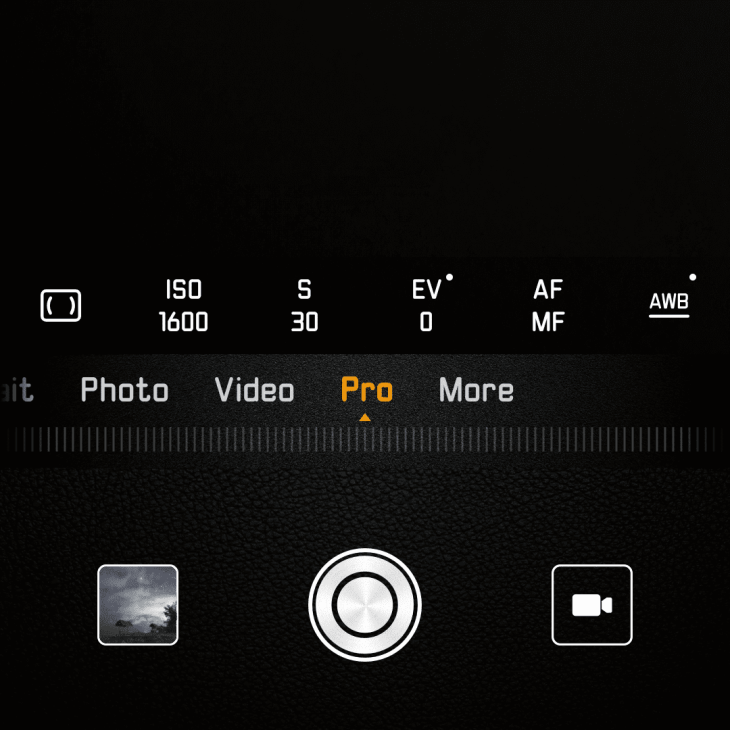
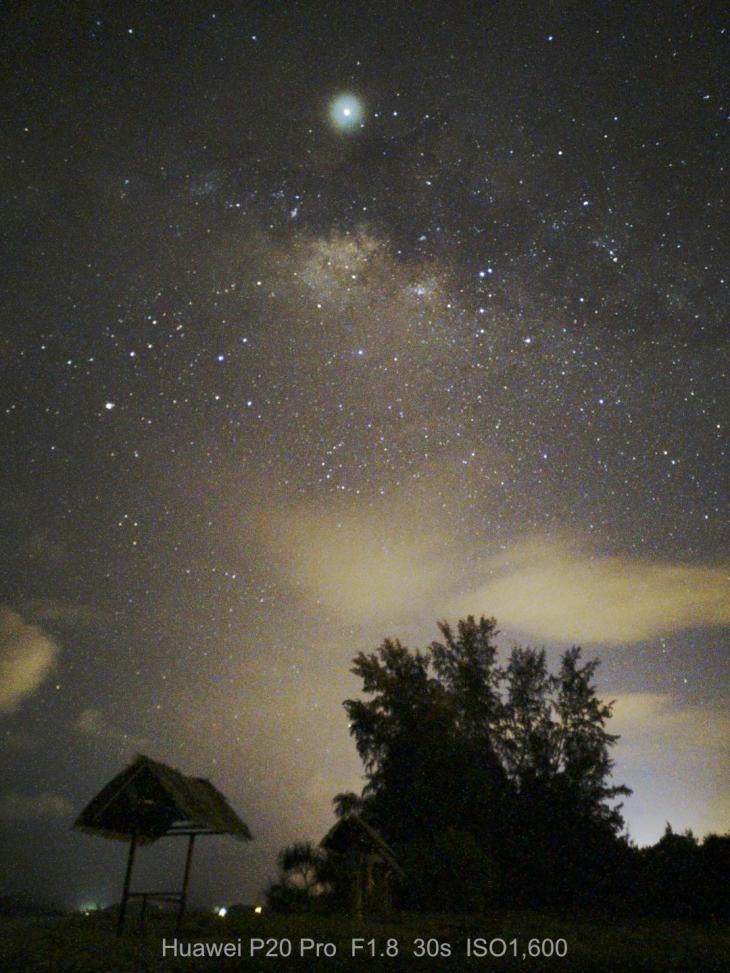
I took the first shot with the Huawei P20 Pro in Pro mode and only manually set it to manual focus (MF). The resulting image looks quite good on the phone. I was quite surprise that the ISO was automatically set at 526 instead of some higher value.
Milky Way shot with the Huawei P20 Pro JPEG SOOC
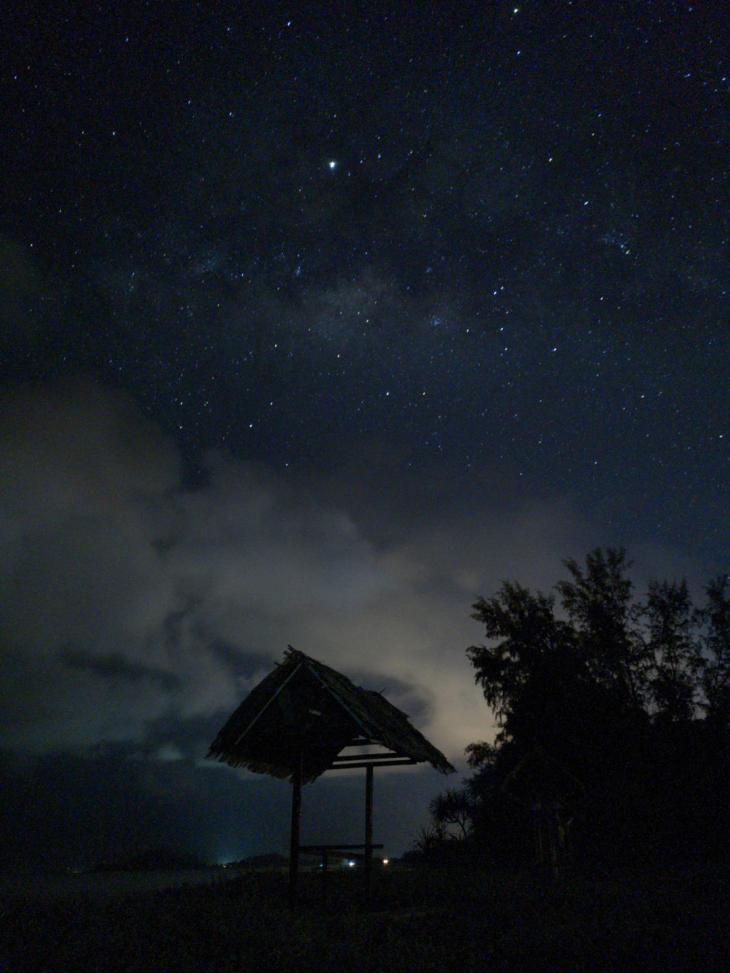
Next, I changed the settings in the camera Pro mode.
Then I took another shot at ISO 1600. The image was brighter but a lot more grainy.
I would have done more tests at ISO between 500 and 1600 to check the graininess if not for the very cloudy sky. Would ISO 640 or 800 give a better image of the stars?
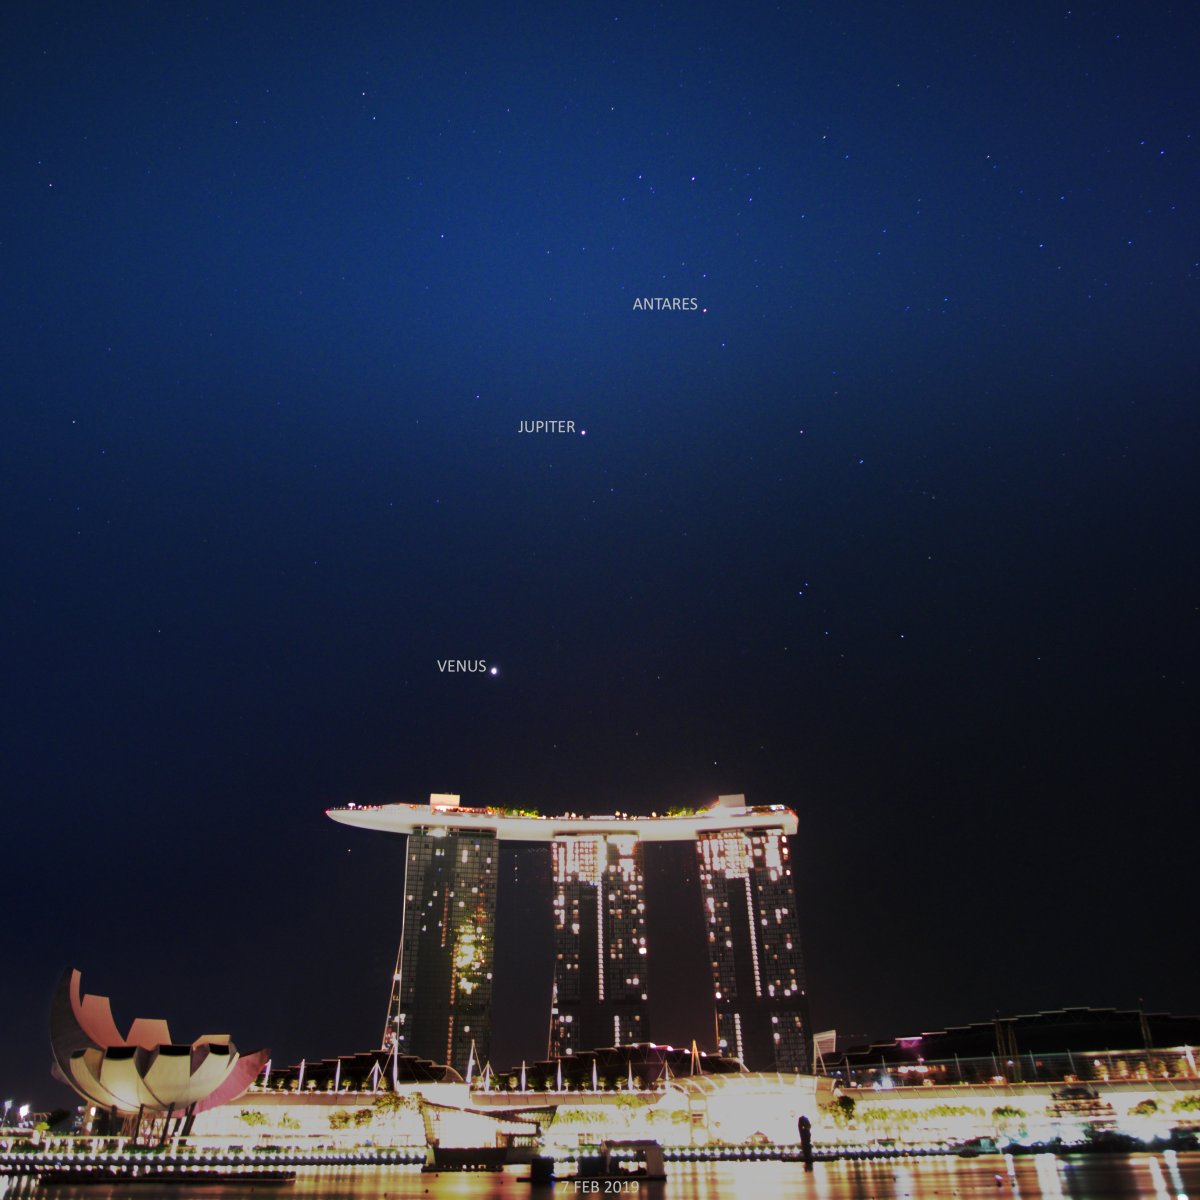
For the past few days, the early morning sky has few clouds. After some research on Stellarium and close monitoring of various weather apps, I got my camera gears packed and ready for the early morning starry sky photo shoot on 7 Feb 2019 at the Merlion Park. I managed to capture the brighter stars and planets e.g. Venus and Jupiter.
Starry Sky HDR Stack
Here’s a stack using James Ritson’s Artic Chamber HDR merge of 2 photos taken with Fujifilm X-T1 and the kit lens Fujinon Lens XF18-55mm F2.8-4.0. The Milky Way (Galactic Centre) is faintly visible above Marina Bay Sands!
In order for city dwellers in Singapore to stargaze and take photos of the starry night sky, we have to travel across the causeway to Malaysia.
I visited Srikandi Resort in Mersing twice, once on my own and another time with a group of astrophotographers led by Remus Chua.
I went to Srikandi Resort in June 2017 and again in March 2018.
Mersing Milky Way Trip, June 2017
For my first trip, I travelled by public transport. I took the bus from Singapore to Larkin. From JB Larkin Sentral, I took the S&S express bus to Mersing Bus Terminal. Then I took a taxi to the Srikandi Resort, about 30 minutes’ drive north of Mersing town.
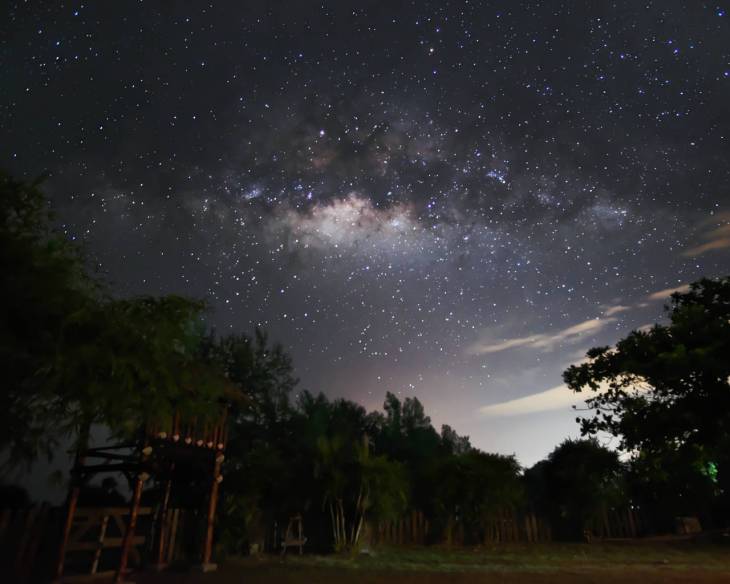
It was a weekday and there was no other guest. The place was empty and really dark at night. Despite the not so clear sky, I was able to see the Milky Way!
The dark sky at Srikandi Resort Mersing on 20 June 2017
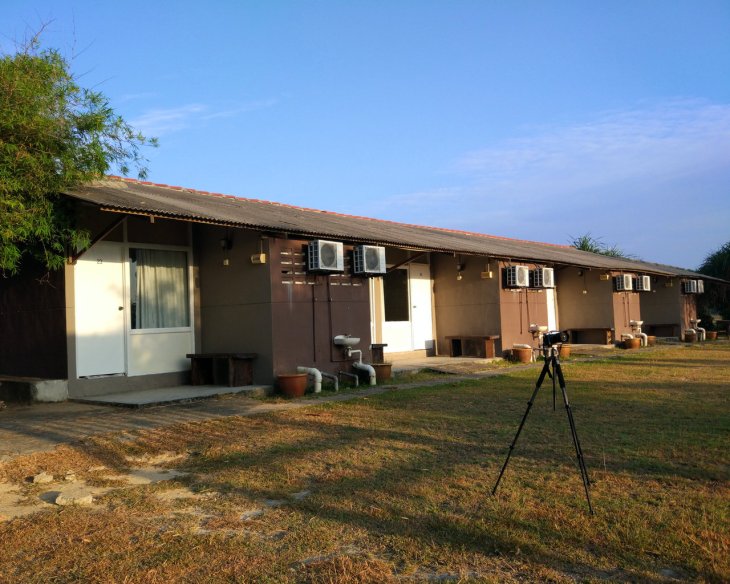
The resort’s kitchen only opens on weekend and there is no restaurant nearby. As such, I stayed for only one night on my first trip as I did not want to carry more than one day’s ration of food and drink.
Mersing Astrophotography Trip, March 2018
To save the hustle of taking multiple buses and taxi rides, I decided to join 3D2N Astrophotography Trip to Mersing in March 2018 organised by Remus Chua, founder of the SingAstro forum.
The assembly and pickup point was at Kranji MRT on a Friday morning. Beside the two-way transportation by MPV between Kranji MRT and Srikandi Resort, meals (2 dinners, 2 breakfasts and 1 lunch) were provided at the resort during the 3D2N weekend trip. Visit www.celestialportraits.com to find out more.
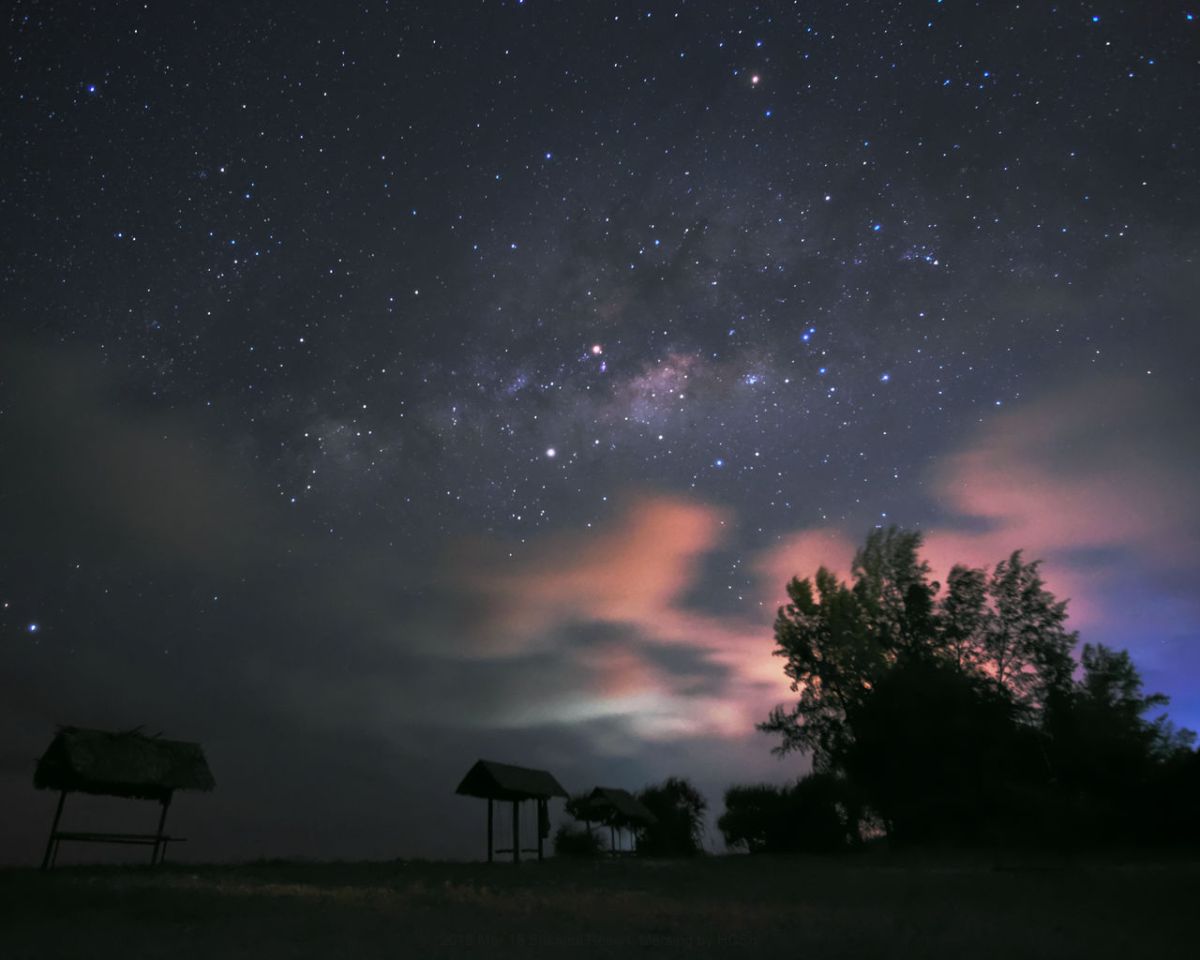
Milky Way at Mersing Srikandi Resort on 17 Mar 2018
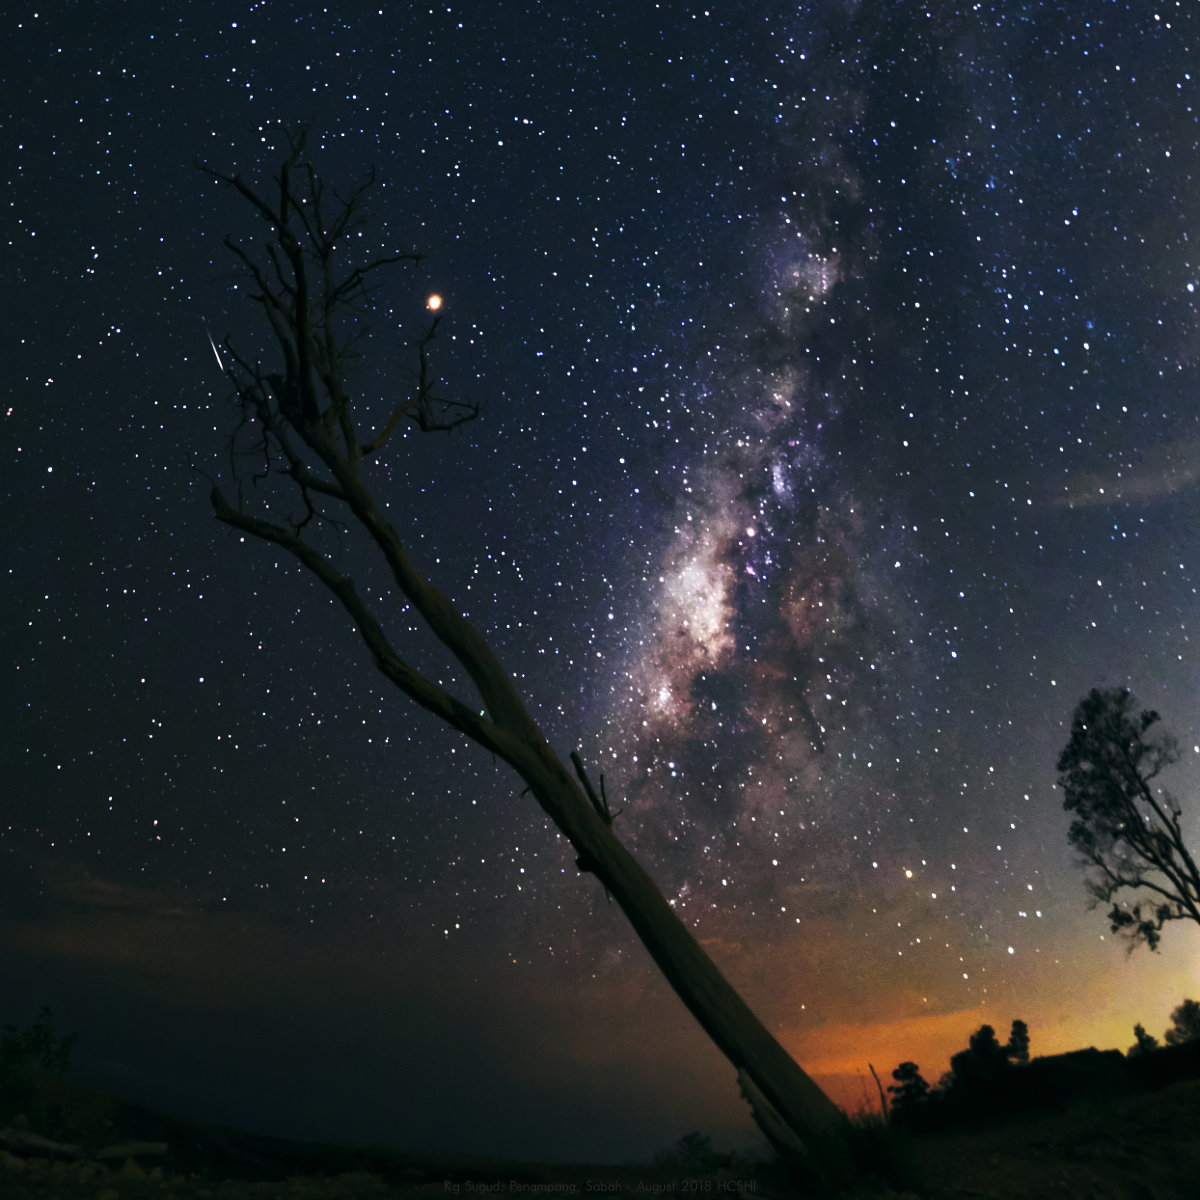
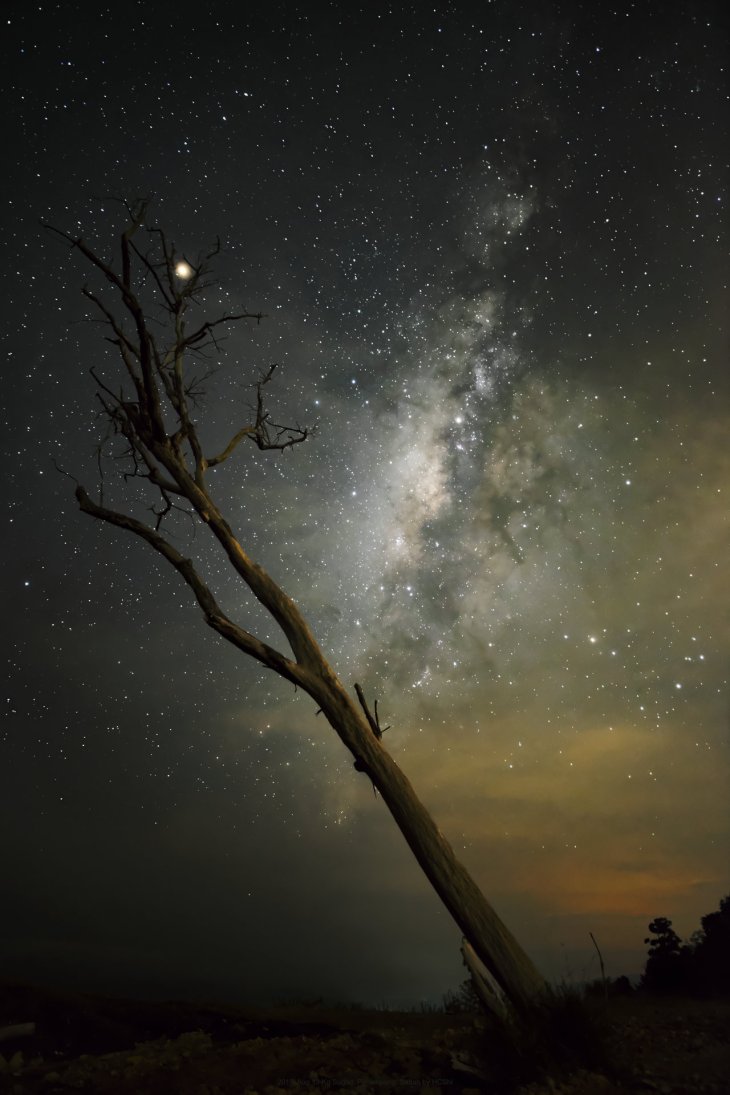
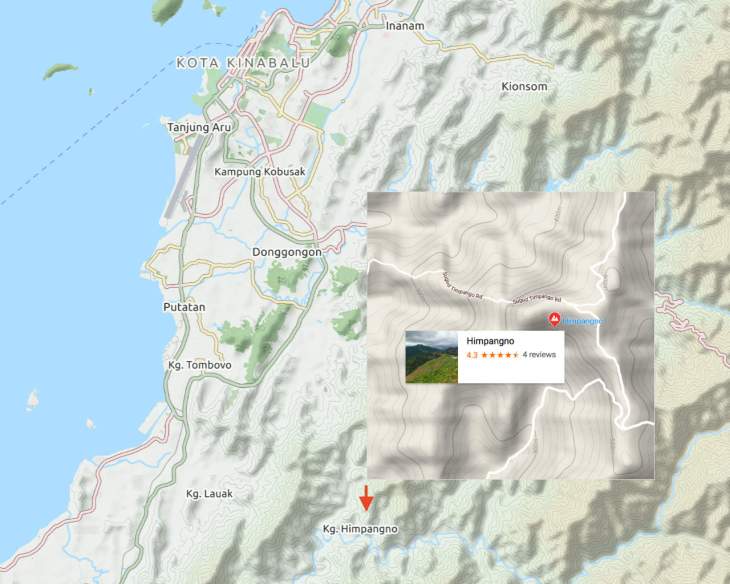
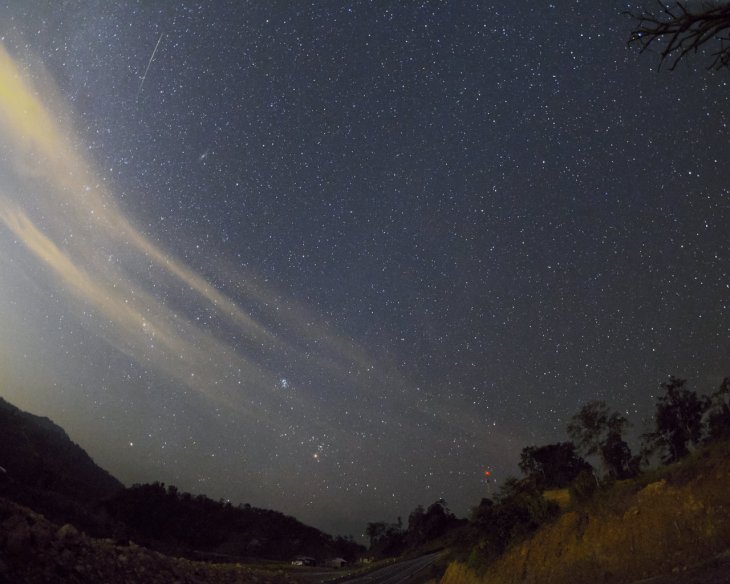
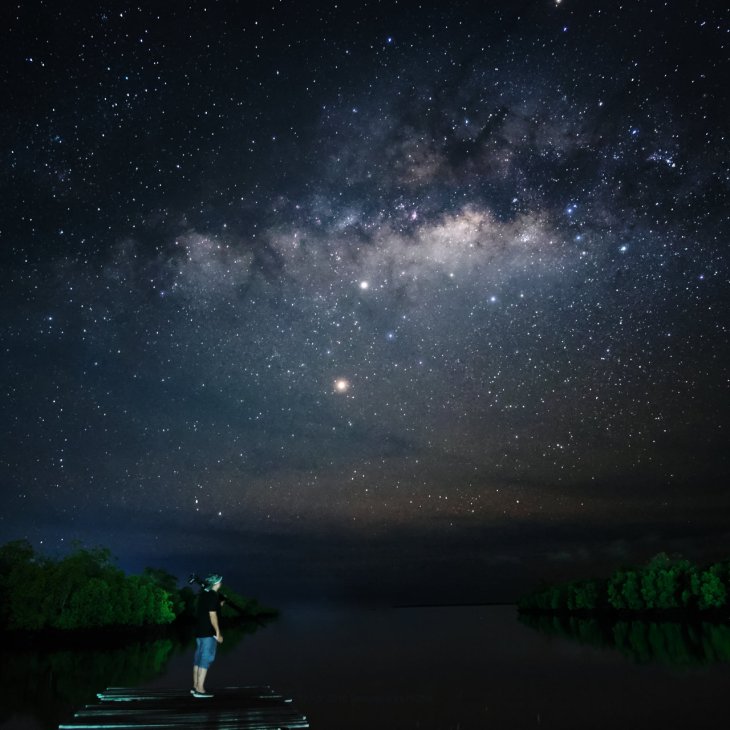
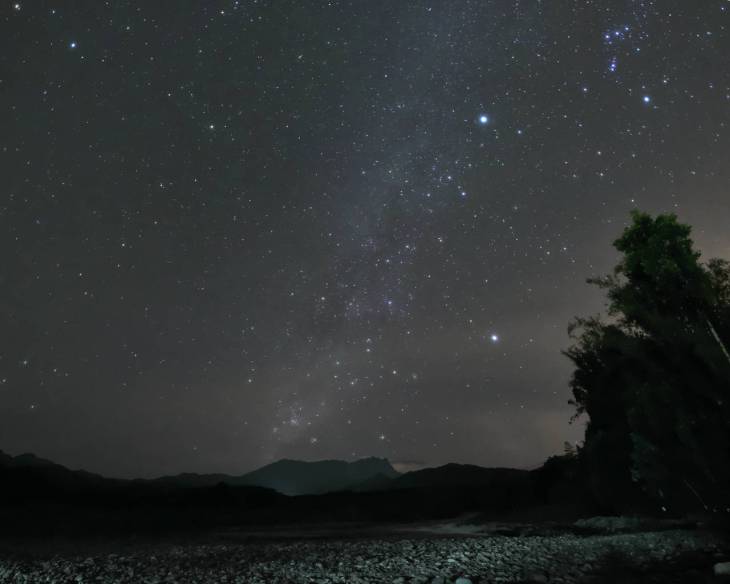
Last August I went camping in Sabah hoping to catch a glimpse the Perseid Meteor Shower. I spent the first two nights at the Tegudon Tourism Village, a popular camping site for stargazing about 2 hours’ drive from Kota Kinabalu, to shoot the meteor shower and Milky Way. On the third day’s afternoon, I was back in the city hoping to catch up with my sleep before taking the morning flight. Instead, a friend insisted that I should go try my luck shooting the Milky Way in Kota Kinabalu at a dark location about 30 minutes’ drive from the airport.
The “newly discovered” stargazing spot near Kota Kinabalu was located up in the hills along the Sugud Timpango Road. Standing at 600m above sea level, I could see the bright lights of Kota Kinabalu city. In the south direction was the Crocker Range and the sky was cloudy.
When we arrived at 10pm, the stray light from the city of Kota Kinabalu was bright enough to be reflected by the low clouds and made visible the nearby trees and excavated slope.
The low cloud started to clear and the sky became darker later in the night when the city went to sleep and the lights went off. The hazy band of stars became more visible and I could actually see the Milky Way with my naked eye!
According to the local people, the area is known as Kampung Sugud, Penampang. However, the nearest landmark indicated on OpenStreetMap.org and Google Maps when I tried to search for the exact location online is known as Himpangno. Here’s the map below if you’re interested to visit this place.
[Updated 6 Nov 2019]
The Sugud stargazing spot has been added into Google Maps recently. You can navigate there by searching for “Sugud Milky Way Plain” or click here.
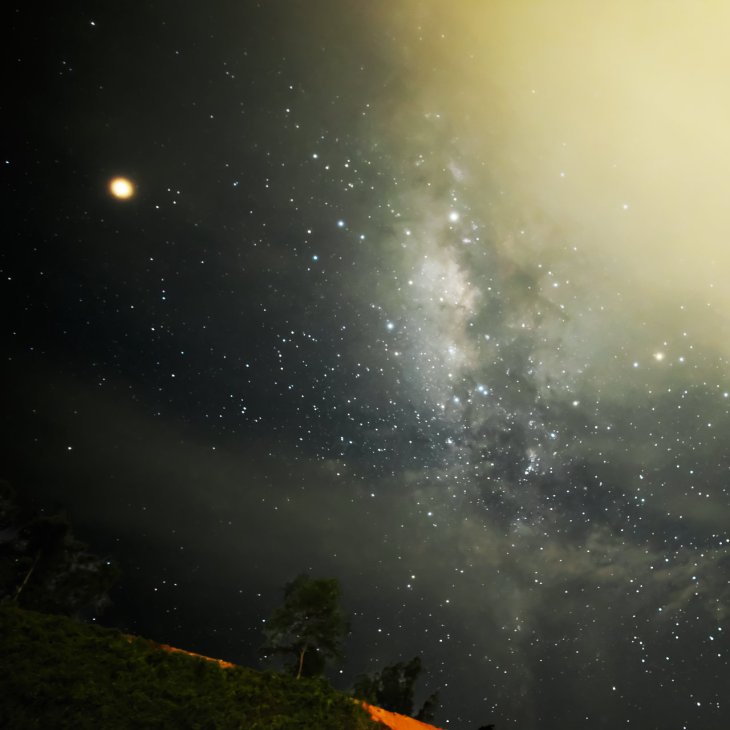
After some quick recce of the area I found a lone declining tree and decided to use it to frame the Milky Way shot. The planet Mars was shining brightly and appeared to be relatively bigger due to the diffused light caused by the thin cloud. It would have been better if the sky was clear and completely without cloud.
Being here for the first time and able to capture several satisfactory shots of the Milk Way made me want to return again.
This location is great for stargazing and seeing the Milky Way in Kota Kinabalu. I really envy the locals who live nearby and can come up here as and when there is no moon and the sky is clear.
When I first visited Sabah to join the Hunt for Milky Way in 2017, I brought along a borrowed Canon 600D DSLR camera fitted with the EF-S 10-22mm F/3.5-4.5 ultra wide-angle zoom lens. The result was not good because of my lack of experience in taking night photography and long exposure shots. Furthermore, I did not spend time to learn and practise to use the functions of the Canon DSLR.
One big mistake I made was NOT turning off the Long Exposure Noise Reduction function and I have to waited several seconds after every shot before taking the next. An experience astrophotographer, Harris Jeffrey, from Sabah Stargazer helped me to check my camera and corrected the settings. I learned a lot during the 7 nights of shooting at different dark sky locations in Sabah. The locations include: Tambunan Viewing Point, Hounon Ridge (Bundu Tuhan), Tip of Borneo (Kudat), Tambatuon Homestead, Lasau Podi (Kota Belud) and SK New Guakon (Tuaran).
Here’s a couple of Milky Way photos I took with the Canon 600D + EF-S 10-22mm.
F3.5 | 25s | ISO3200 | Canon 600D + EF-S 10-22mm
F3.5 | 25s | ISO3200 | Canon 600D + EF-S 10-22mm
As far as camera gears are concerned, I learned that a fast lens is definitely required and it has to be F2.8 or faster, preferably F2.0 or F1.4. Then I can either use a lower ISO to reduce the noise or faster shutter speed to reduce the star trails. As you can see from the images above are noisy and not very sharp.
I was disappointed by the photos but fascinated by the starry sky in Sabah. My new found interest in stargazing prompted me to invest in my own camera and lens setup for Milky Way photography.
Fujifilm X-T1 and Samyang 12mm F2.0
After several days of intense research online, my conclusion was to buy a Fujifilm X-T1 mirrorless camera and the Samyang 12mm F2.0 manual focus lens. This is a light-weight and compact setup consists of the camera body, the lens, the tripod, spare battery and memory card. I do not even need a separate intervalometer remote control because the X-T1 has built-in time lapse function.
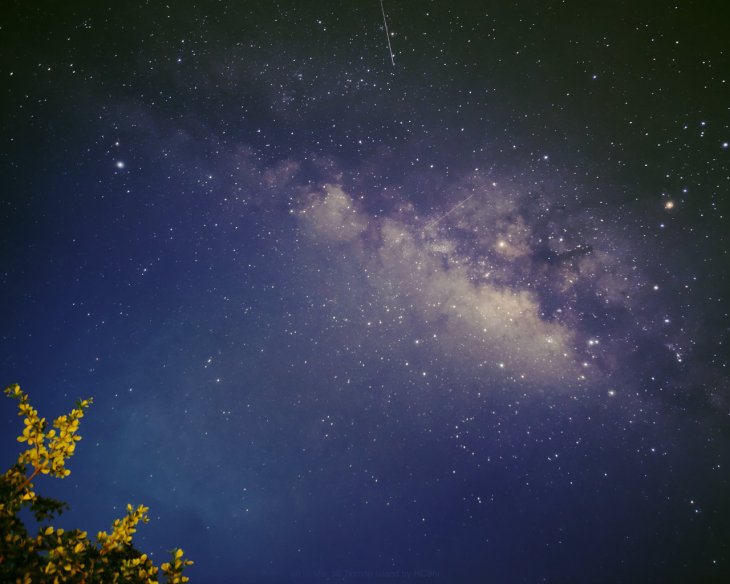
Within a month of returning from Sabah’s Hunt for Milky Way Trip, I went to Tioman Island to test out my new camera and lens. Here’s a couple of shots from that trip.
I was quite happy with the X-T1 camera and Samyang 12mm lens. The night skies and Milky Way photographs I shot at Tioman Island were much better than those I shot in Sabah a month earlier. They are sharper and less noisy even at ISO6400. And I love the Fujifilm colours straight out of camera.
It has been more than a year since I shot with the X-T1/Samyang 12mm setup and used it on several trips to Malaysia to shoot the Milky Way and the meteor showers.
My Camera Settings for Milky Way Shots
Here’s a checklist of settings on my X-T1 when I’m going on a Milky Way trip:
Set Image Quality to record in RAW format.
Set Long Exposure NR to “OFF”
Pre-focus the lens to infinity when there’s still daylight.
Set the white balance to “Auto”. Sometimes, I’ll select custom setting and use “4000K”.
I use manual mode for all the Milky Way shots. I always start with a couple of test shots at this exposure setting: F2.0, 25s and ISO 6400. Then I’ll adjust the shutter speed and sometime the ISO to get the ideal exposure for the image. I tend to overexpose most of my shots and then correct it in the post-processing. However, the longer shutter speed caused the star trails and the brighter stars would not appear to be perfectly circular. In order to shave a few more seconds off the shutter speed, I’ll need a faster lens. And that will be a topic for another blog post.
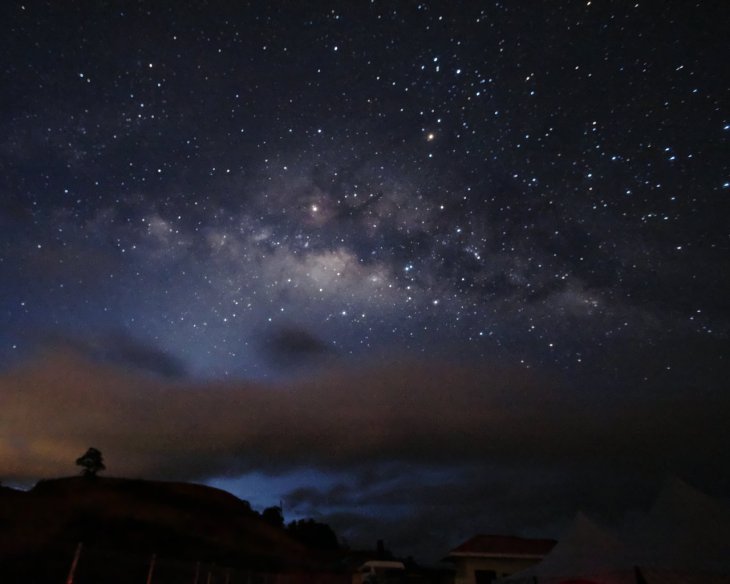
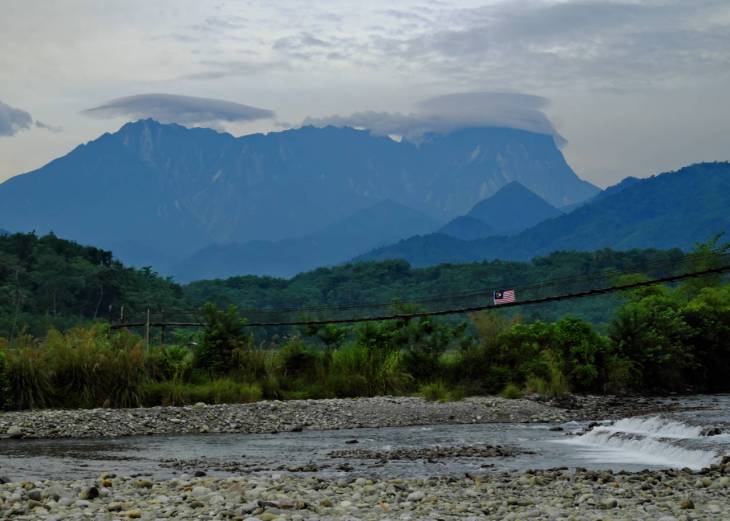
The idea of camping next to a pristine river with Mount Kinabalu in full view and the chance to see Geminids Meteor Shower was an opportunity too good to pass up. With luck, we might even be able to see the Winter Milky Way!
Geminids Meteor Shower 2017
Knowing that December is one of the wettest month of the year in Sabah didn’t stop our yearning to see one of the greatest meteor showers.
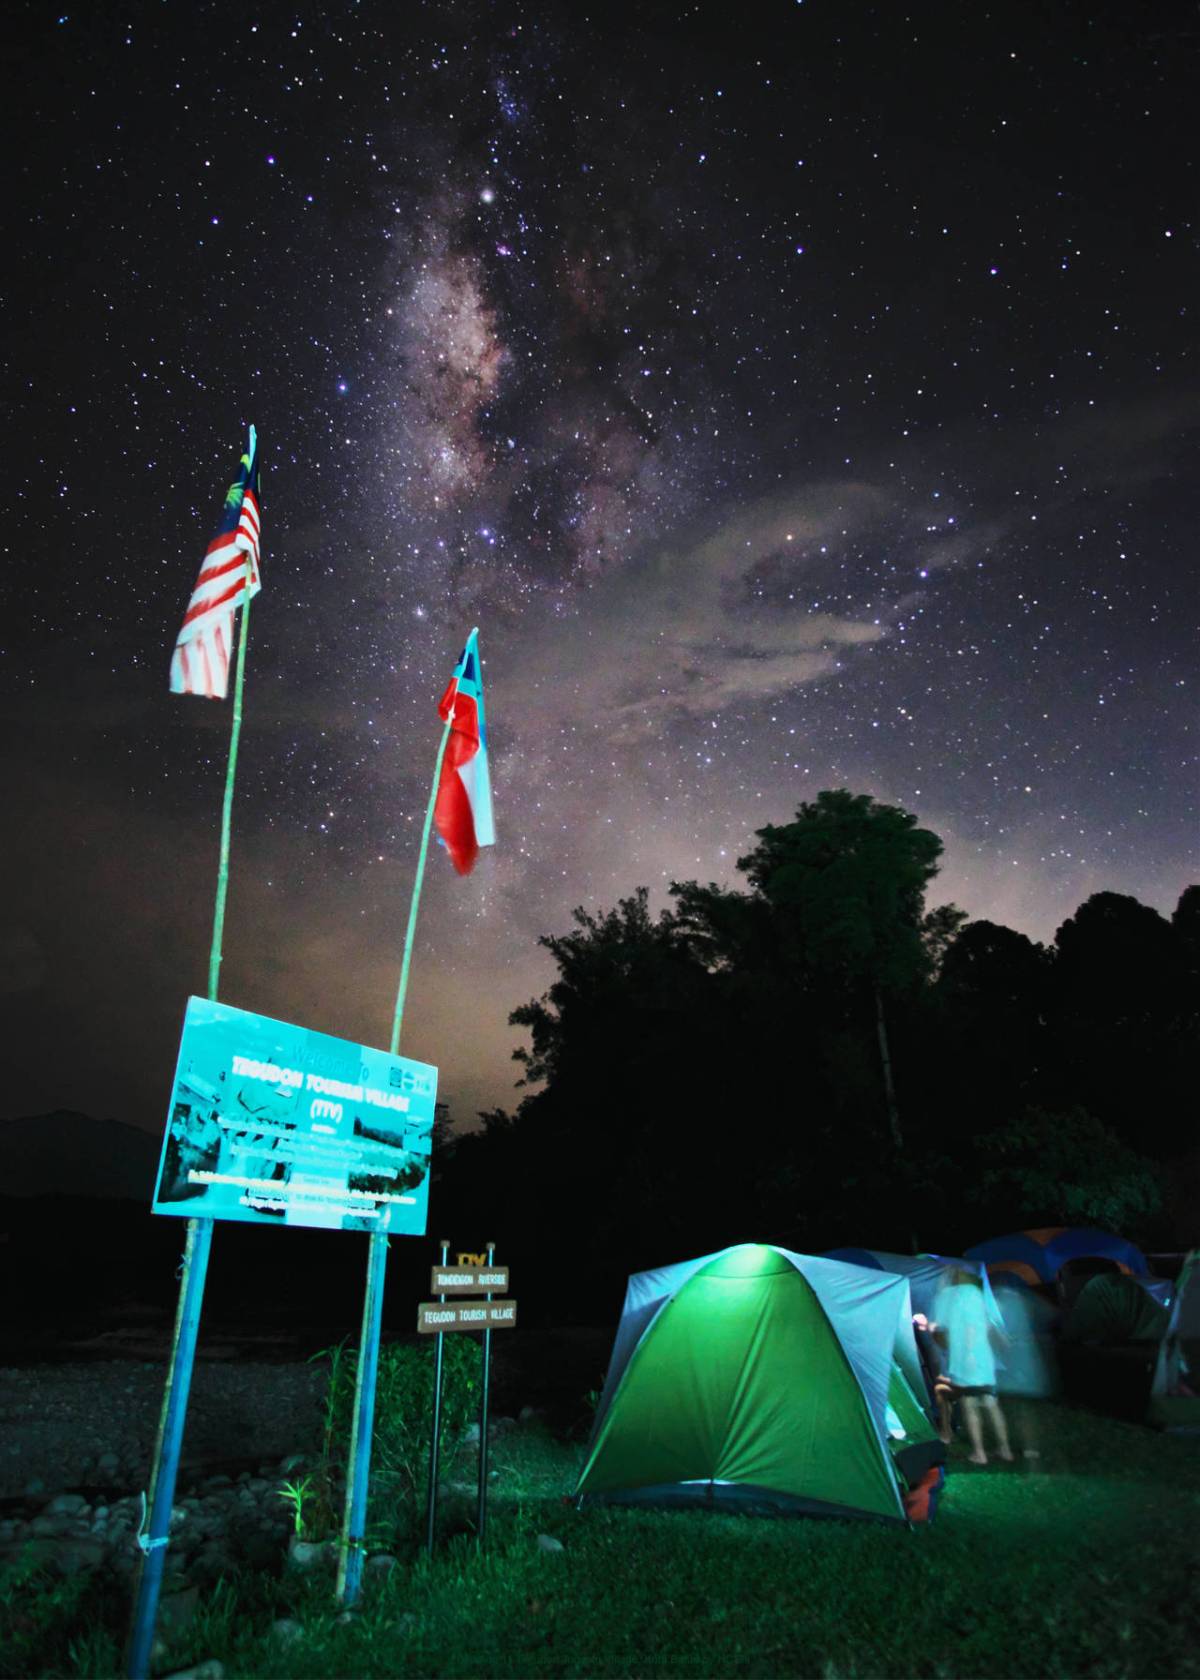
So my wife and I made the trip in December 2017 and camped at Tegudon Tourism Village, Kota Belud. We were quite lucky that it didn’t rain during our two nights camping at Tegudon Tourism Village.
Geminid’s fireball captured at Tegudon Tourism Village on 17 Dec 2017.
The sky was overcast most of the time and only cleared up briefly during the night. We managed to catch several meteors and glimpses of the Winter Milky Way.
Mount Kinabalu and Winter Milky Way at Tegudon Tourism Village.
Overall, our first camping trip to Sabah turned to be better than expected despite our worries about the heavy rain due to the northeast monsoons and possible flooding!
We were happy to have enjoyed the bathing and rafting at the river, caught several glimpses of the Geminids meteor shower, and took photo of the majestic Mount Kinabalu with the Winter Milky Way as the backdrop.
Parseid Meteor Shower 2018
In August 2018, I camped again at Tegudon Tourism Village hoping to capture the Parseid Meteor Shower and the Milky Way. However, the sky was cloudy on both nights and most of the shots were obscured by the clouds.
Camping under the stars at Tegudon Tourism Village, Kota Belud, Sabah.
I only captured two shots with a meteor out of the several hundred frames on time-lapse.
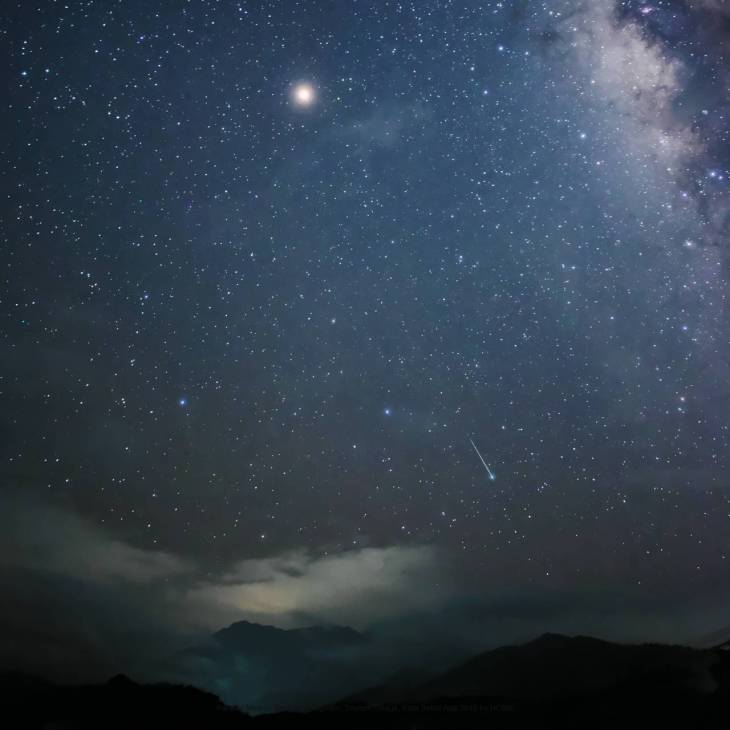
Mars and Parseid’s fireball over Mount Kinabalu on 10 Aug 2018.
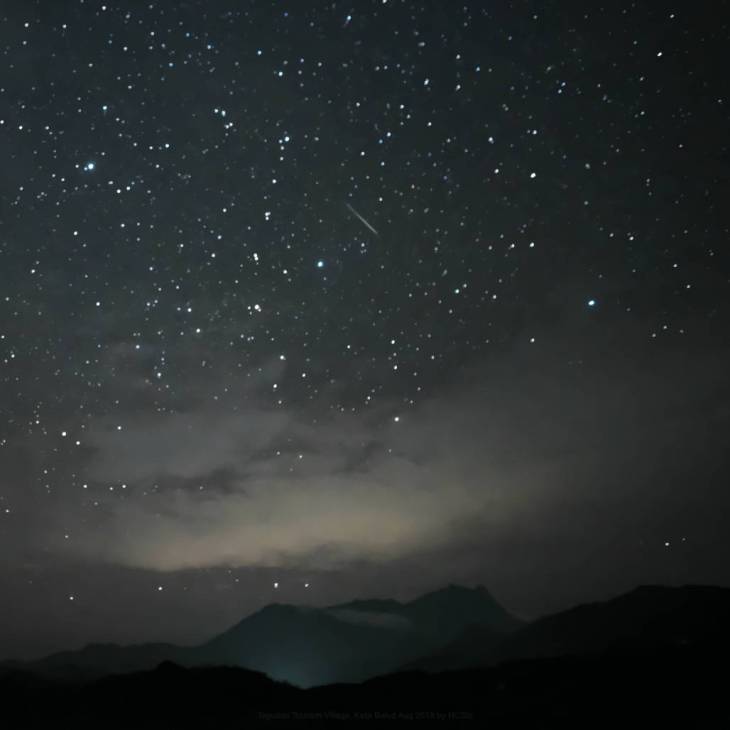
Parseid’s meteor at Tegudon Tourism Village on 11 Aug 2018.
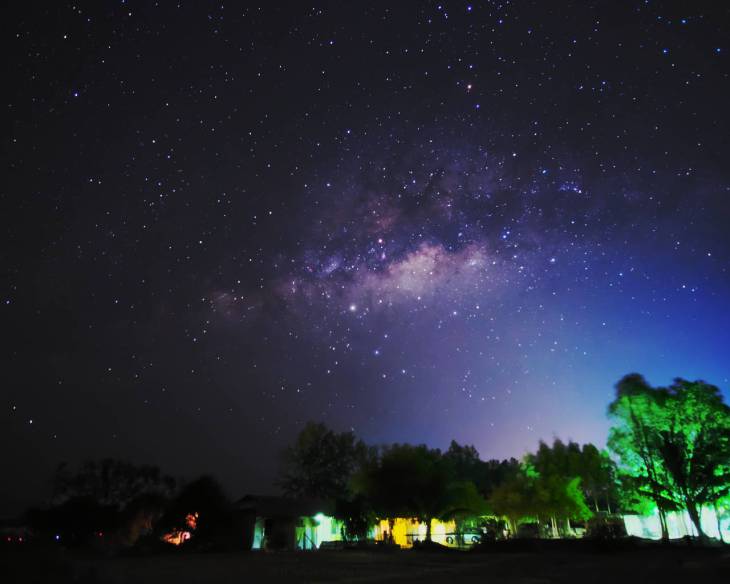
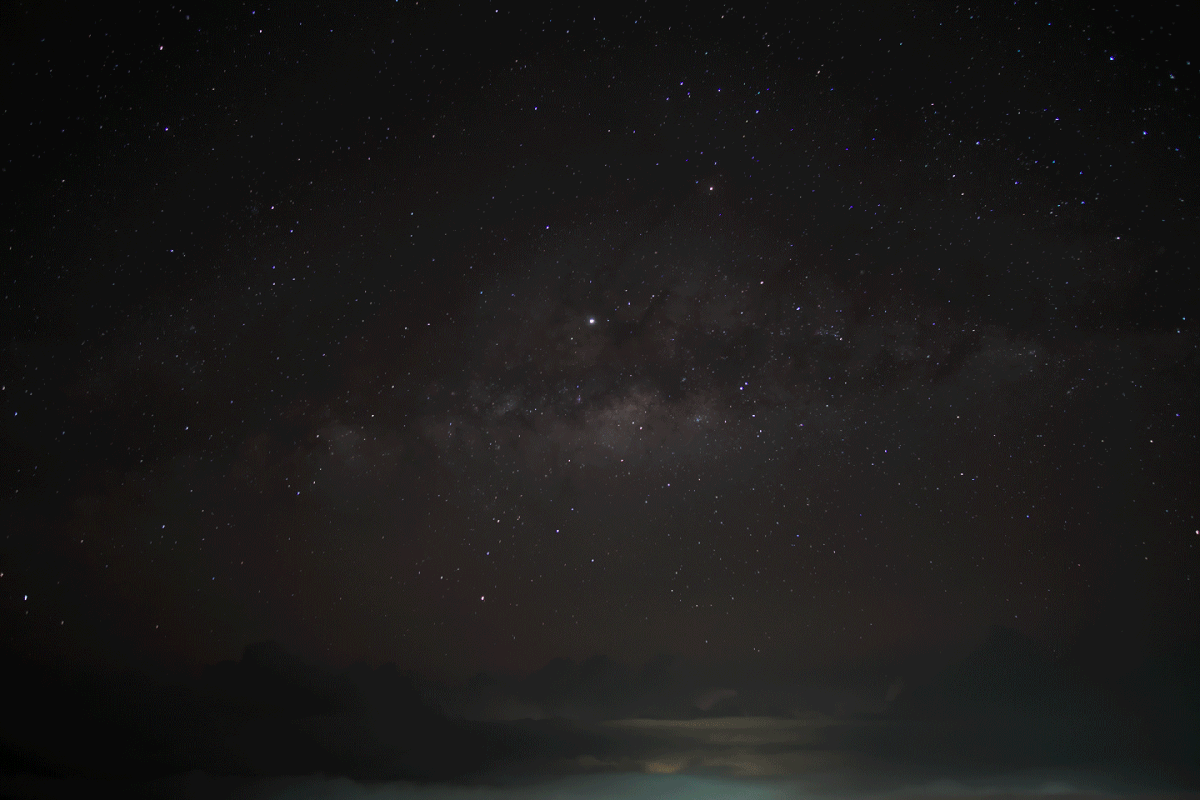
Featured image at the top was photographed during my second camping trip at Tegudon Tourism Village in August 2018.
When I first started astrophotography, my first question was where to find the Milky Way. Later on, I realised our Solar System is part of the Milky Way and I am right inside it. Technically speaking, what I wanted was to photography the Galactic Core of the Milky Way.
The simple answer is: between March and October, point the camera towards the southern sky for the Milky Way center.
I live in a heavily light-pollution city, Singapore, and very unlikely I’ll ever catch a glimpse of the Milky Way. Most of the time, I could only see the brighter stars and planets. When I look towards the Southern sky, sometimes I’ll see the Orion’s Belt or the Southern Cross (Crux).
How to Find the Milky Way without an App
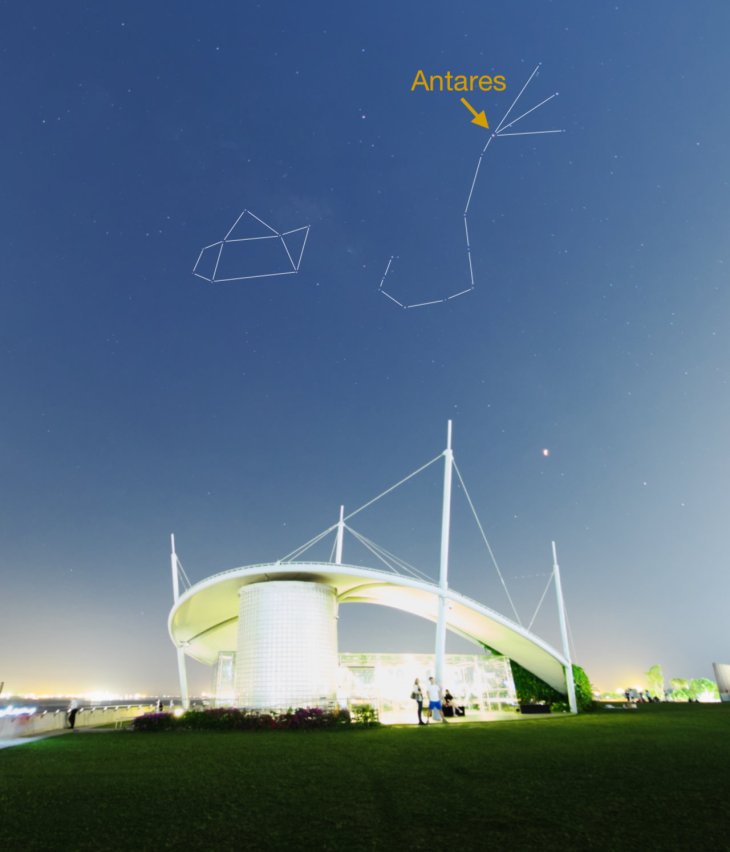
Scorpius, Sagittarius and the Milky Way center vaguely visible at the Marina Barrage, Singapore on 20 Aug 2017 at 8.16pm
After months of stargazing and learning from experienced stargazers, I could now identify the Antares and recognise some of the brighter stars that form the Scorpius. However, I still find it rather difficult to locate the stars that make up the constellation of Sagittarius especially when the Milky Way was still low on the horizon. Instead of using the Sagittarius to find the Milky Way center, I’ll trace the Scorpius constellation with Antares as reference to locate the “tail of the scorpion”. This is where I’ll point my camera to photograph the center of the Milky Way.
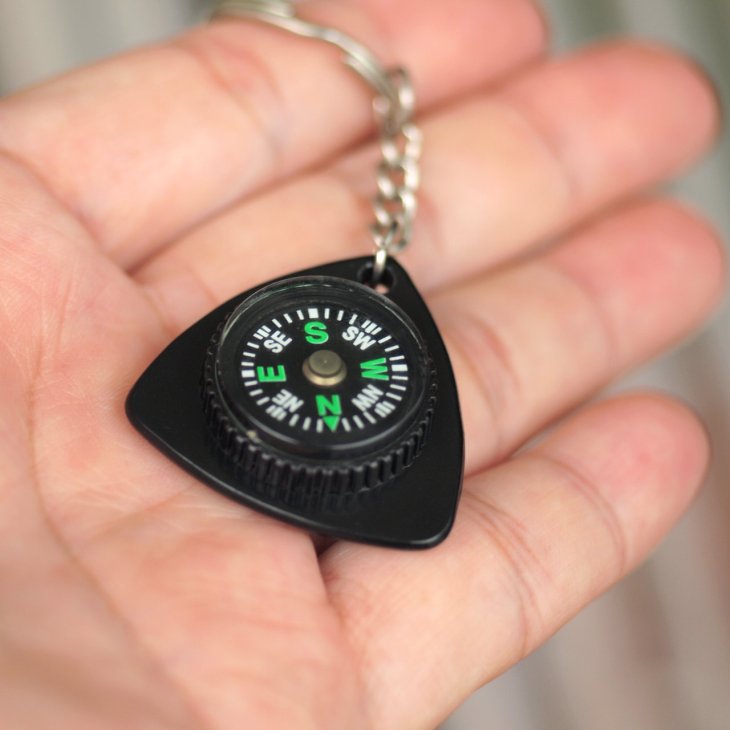
As for locating my direction, I rely on a keychain compass because most of the time the mobile app would not work at dark sites far from the city where the mobile data connection was slow and intermittent.
A keychain compass to find the South(S) and Southeast(SE)
So far, my hunt for Milky Way trips were organised in March or April and the Galactic Core would rise about midnight. I would usually see the Antares rose above the horizon and recognised the Scorpius before the Sagittarius became visible.
Even in light-polluted Singapore on a clear night, one can easily see the bright reddish orange colour Antares and hence identify the Scorpius constellation. The photo above was taken in August at the Marina Barrage in Singapore. It was the first can only occasion where I captured both the Scorpius and Sagittarius, with the Galactic Core vaguely visible.
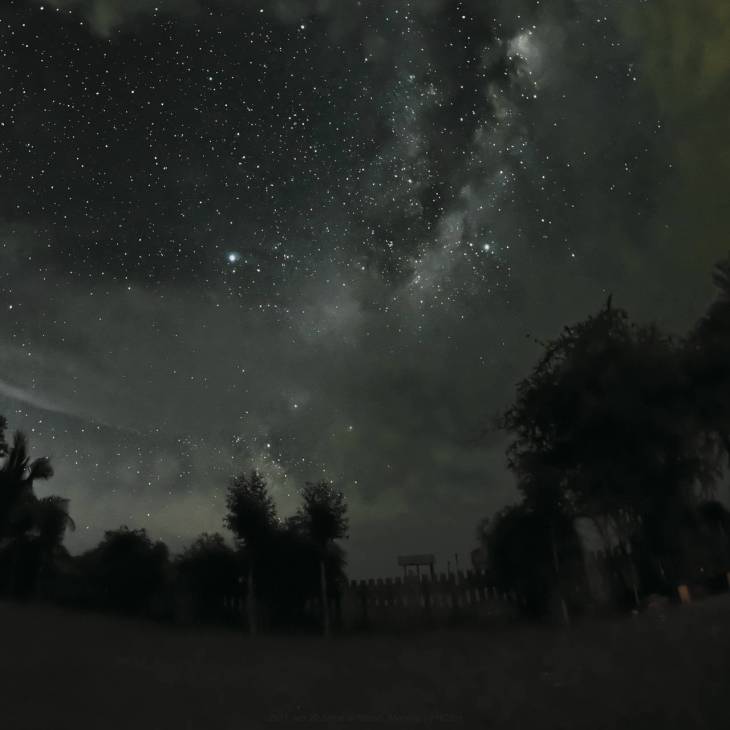
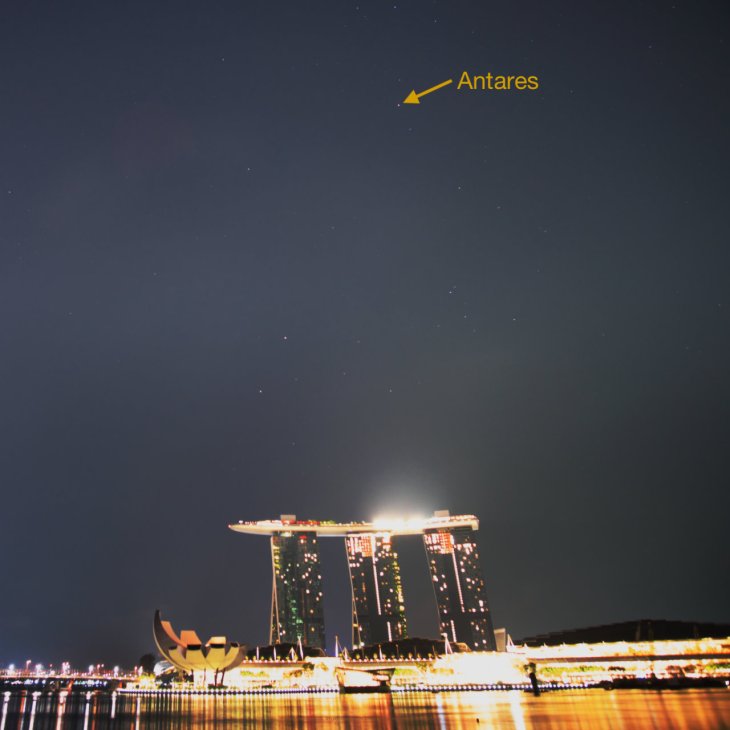
Below is another of my failed attempts to shoot the Milky Way in light-polluted Singapore on 23 March 2018 at the Jubilee Bridge near the Merlion Park.
However, I am satisfied to have captured the Scorpius and part of the Sagittarius despite the very glaring and difficult lighting condition, and the thinly clouded sky.
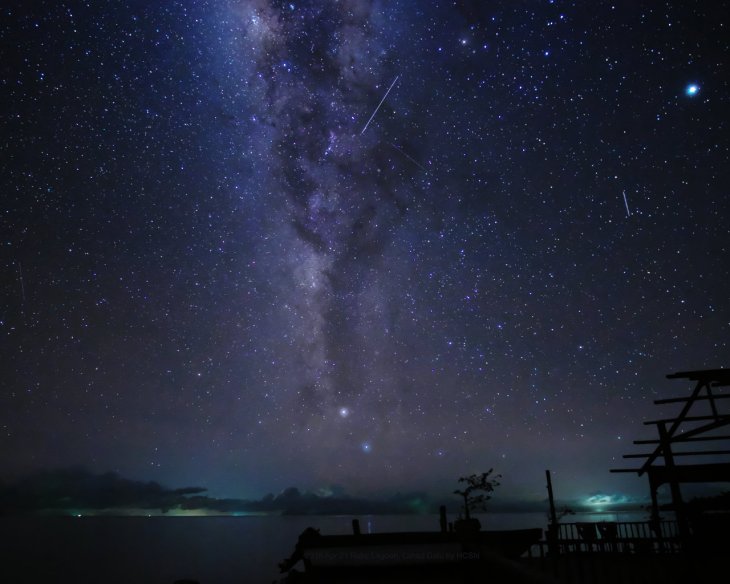
Relative Position of Scorpius and Milky Way – April 2019
During a recent Hunt for Sabah Milky Way trip, I climbed up Maragang Hill to shoot the rise of the Milky Way above the sea of cloud. The sky was exceptional clear and the view at the top was simply stunning. The animated GIF above shows the relative position of Scorpius and the Galactic Core of the Milky Way.
In 2017, I came across a documentary, Aerial Asia, on Channel NewsAsia. I was fascinated by the story on the Bajau Laut in Malaysian Borneo. That part of the video was filmed near the islands of Semporna.
First Trip to Lahad Datu in September 2017
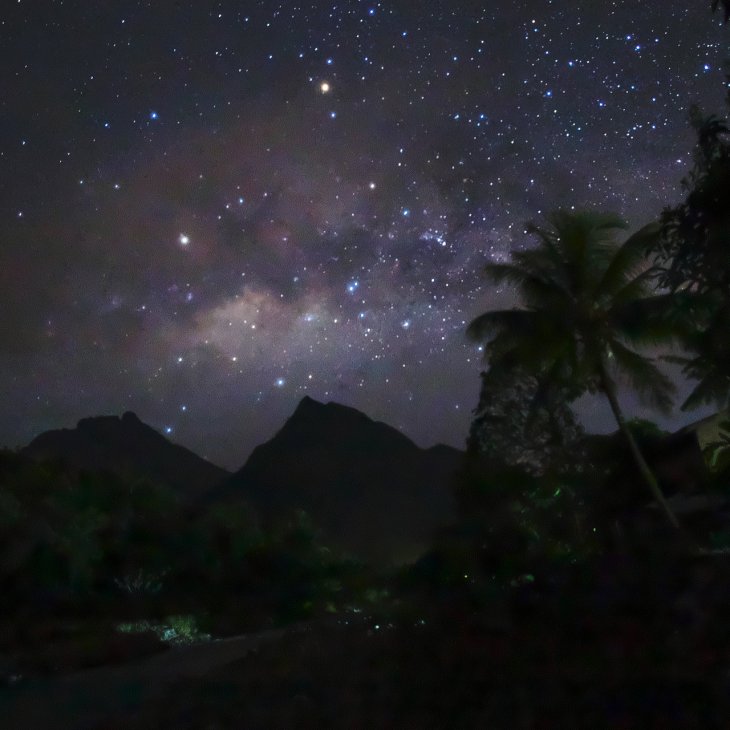
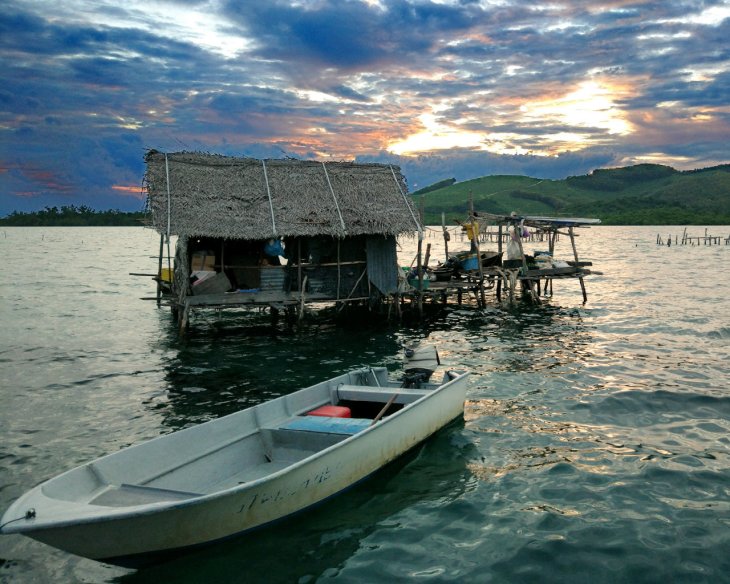
When Sabah Stargazers announced a trip to Tebah Batang Ruby Lagoon in Lahad Datu where I could see the Milky Way and stay with the Bajau Laut community, I was very eager to join the 3D2N Astro Trip: Lagoon of Stars.
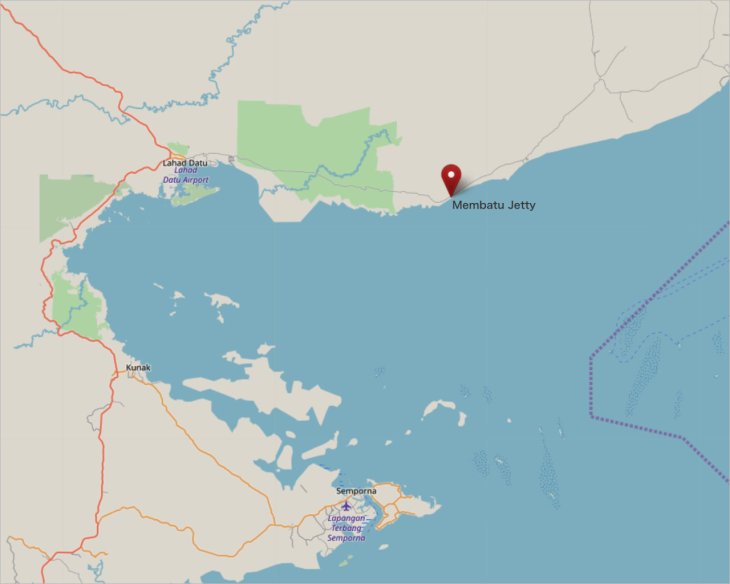
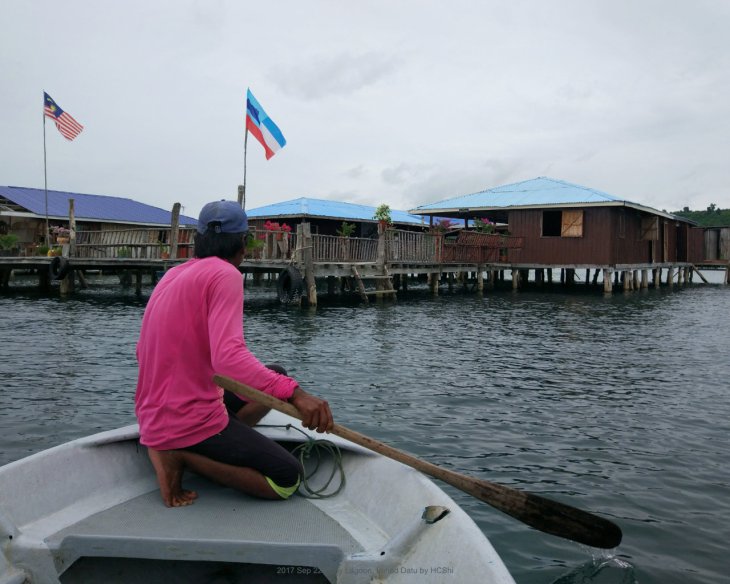
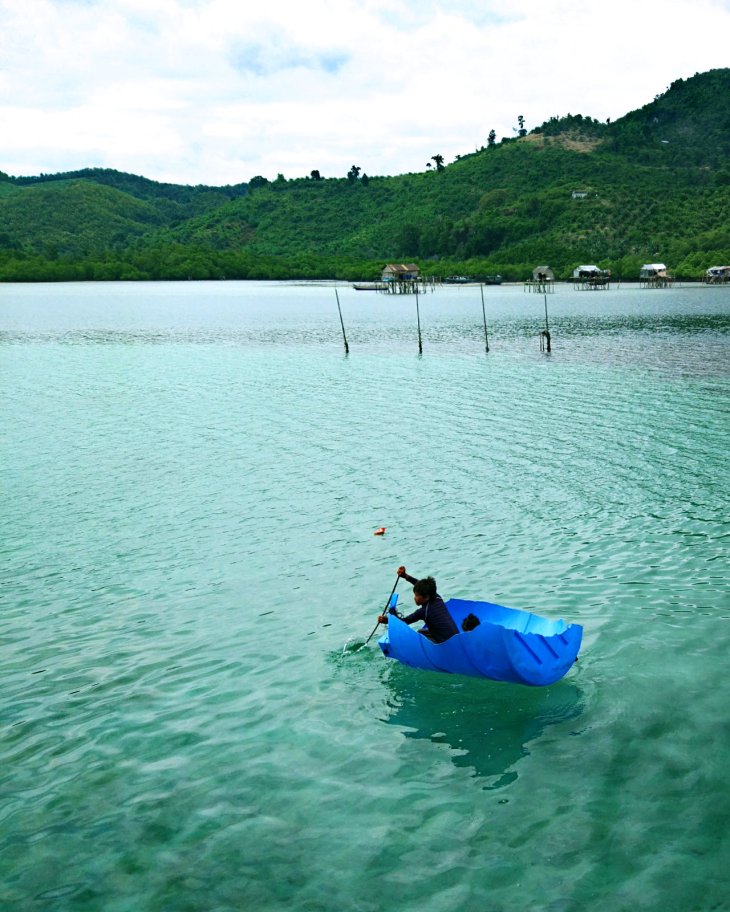
In September 2017, I made my first trip to Lahad Datu. It was a long way from home. I have to fly from Singapore to Kota Kinabalu, stayed for a night before taking a domestic flight to Lahad Datu. Then I joined the rest of the group at Lahad Datu town to share a car to travel another 50 km eastward to Membatu Jetty where we were ferried to the stilt house built over the lagoon at the Tebah Batang.
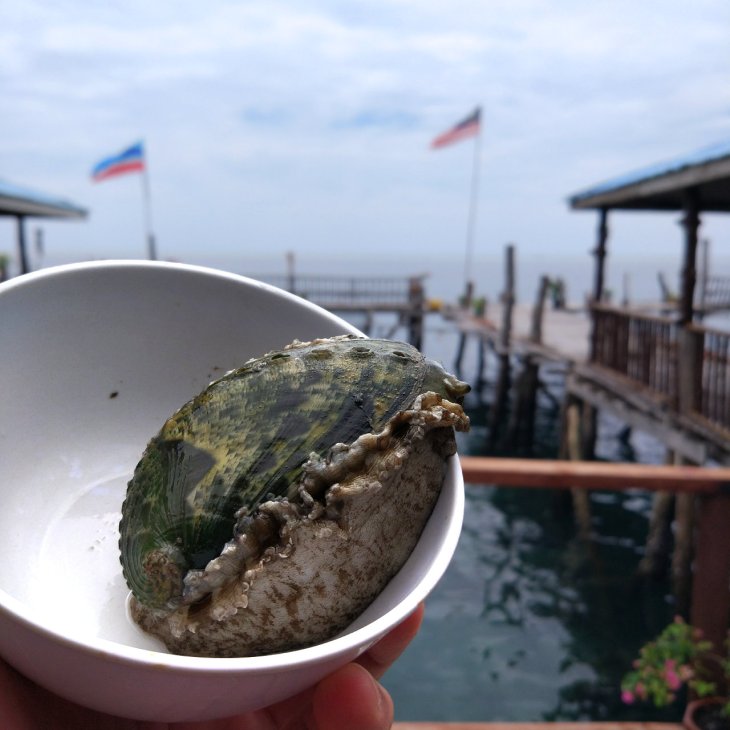
We spent the day swimming in the lagoon and snorkelling at the nearby coral reef. It was a very unique experience to be immersed in such unspoilt natural beauty and the warm hospitality of the Bajau Laut. My experience could be best summarised by Canadian photographer Mark Lehn’s words:
“Seeing these people and being the recipient of their kindness really made me appreciate some of the more simple things in life and the connection between people and our environment.” —Mark Lehn
To find out more about Mark Lehn’s photos on Bajua Laut, click here.
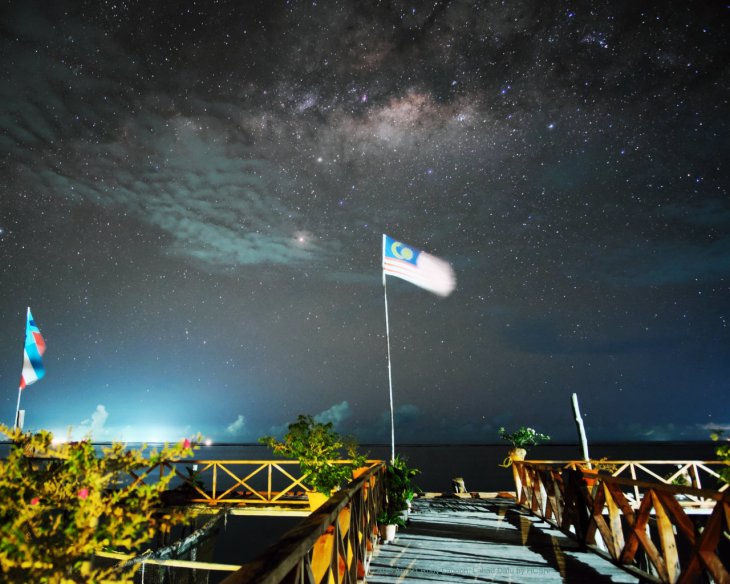
It was already towards the end of the Summer Milky Way season, so we had a very short window of time to shoot the Milky Way in the early evening. Sunset was about 6.30pm in September and we were all set up by 6pm. However, the sky was not cooperating.
It was cloudy but windy so I managed to capture a glimpse of the Milky Way at about 7.15pm. Then we spent the rest of the night waiting for the sky to clear.
We had more luck on the second night and I captured enough shots before sunrise to compile into a time-lapse video.
Second Trip to Lahad Datu in April 2018
It was an amazing experience staying out in the sea and seeing a dark sky with billions of stars. I liked it so much that I went to Tebah Batang again despite having to endure a long tedious journey from Singapore.
In April 2018, I followed Sabah Stargazer’s Hunt For Sabah Milkyway 2018 trip and visited Lahad Datu again. Since it’s still early in the season, the Milky Way would rise later in the night. We expected it to be visible after midnight and for clear sky.
The advantage of shooting early in the season was that we would have ample to time to get ready (maybe even took a nap) for the shoot, and the entire band of the Milky Way in view.
Light Pillar: a common sight on cloudy nights
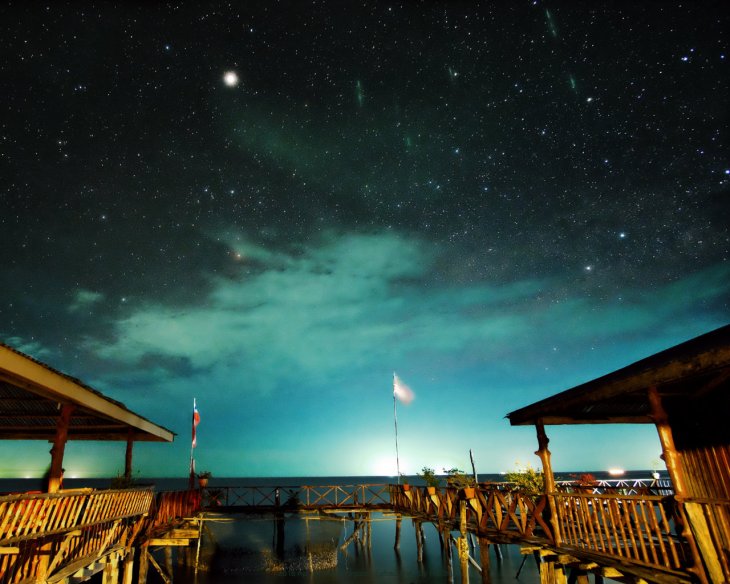
In the early evening, it was cloudy but windy. Thanks to the cloud, I was able to capture my first shot of the light pillar phenomenon.
I guessed those vertical streaks of light were caused by the distant commercial fishing boats flood lights. Afterwards, I was told this light pillar phenomenon is quite common at Tebah Batang lagoon.
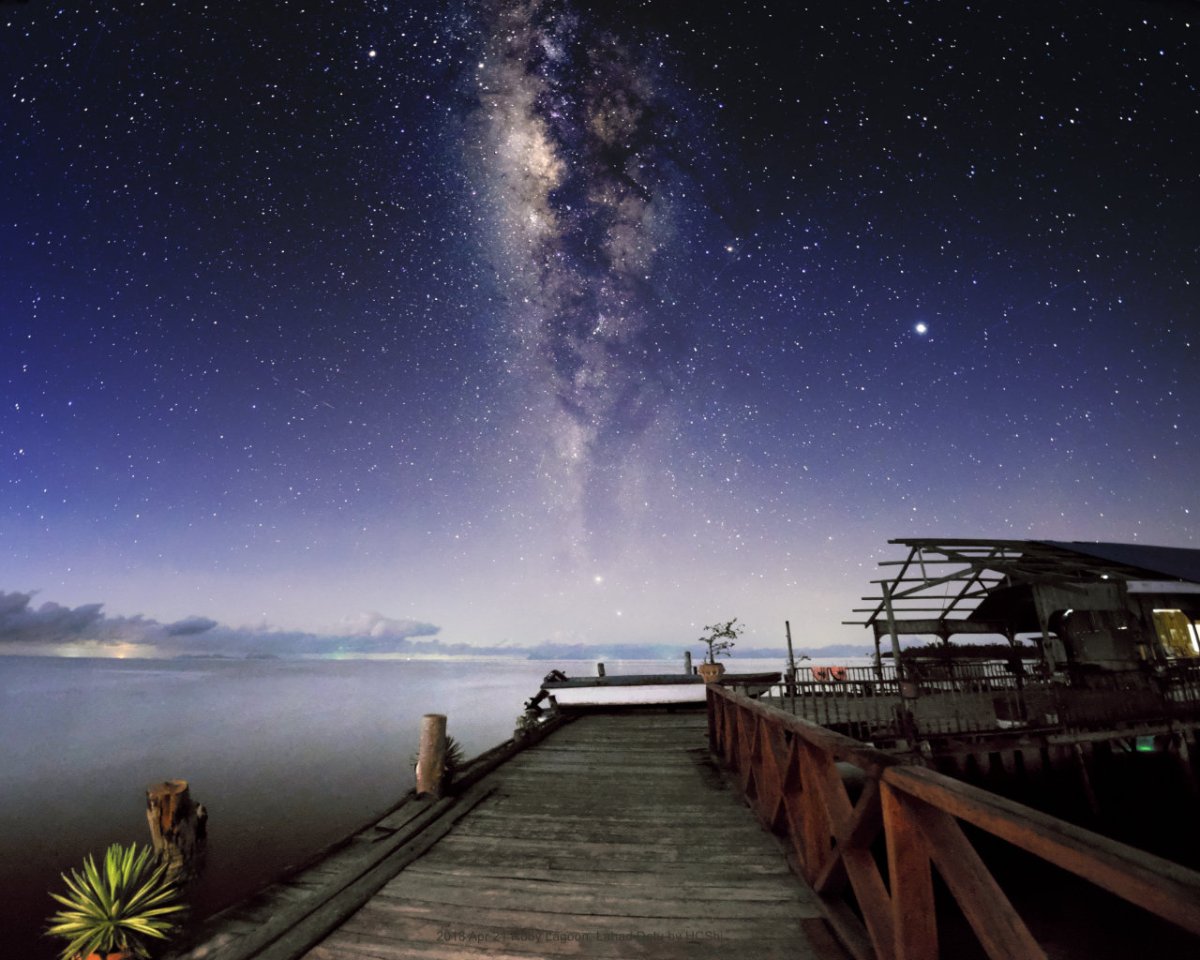
The Milky Way Arch
The sky clear up in the early hours of the morning and I finally got a shot of the Milky Way arch. It would have been a better photo without those glaring flood lights in the horizon!
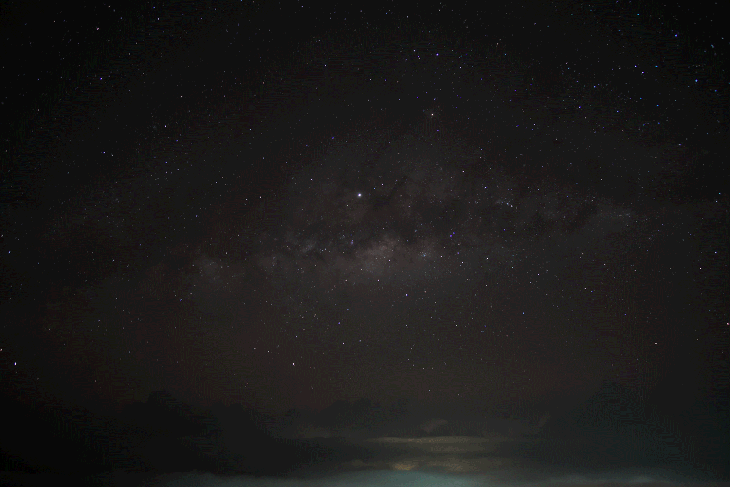
The weather was not as good as the first night. The Milky Way was partially covered by the passing cloud and I was feeling disappointed so I decided to go to bed at 2am.
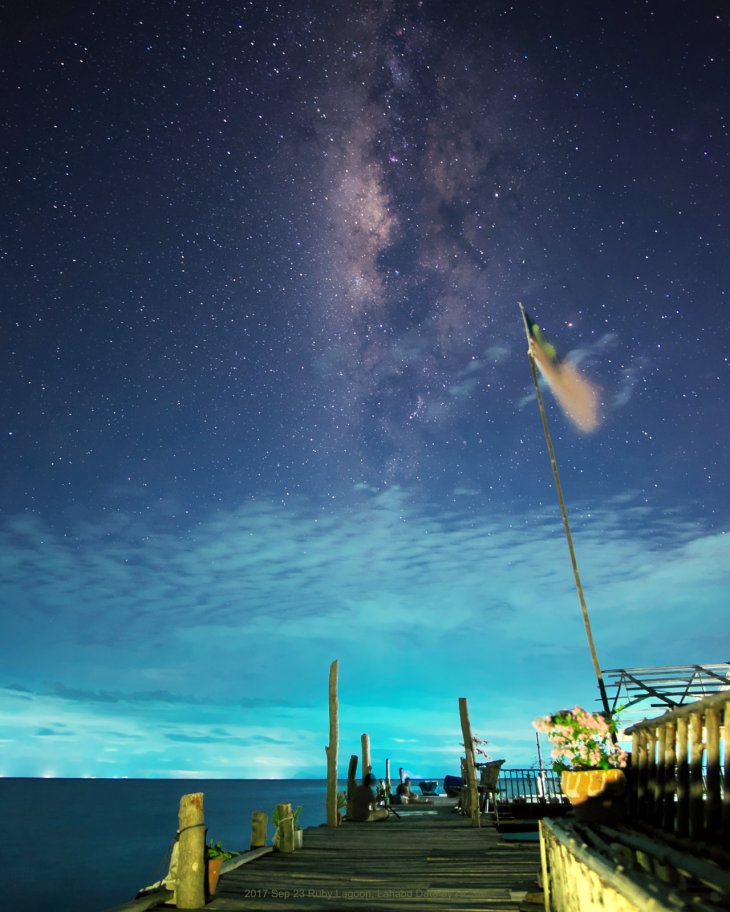
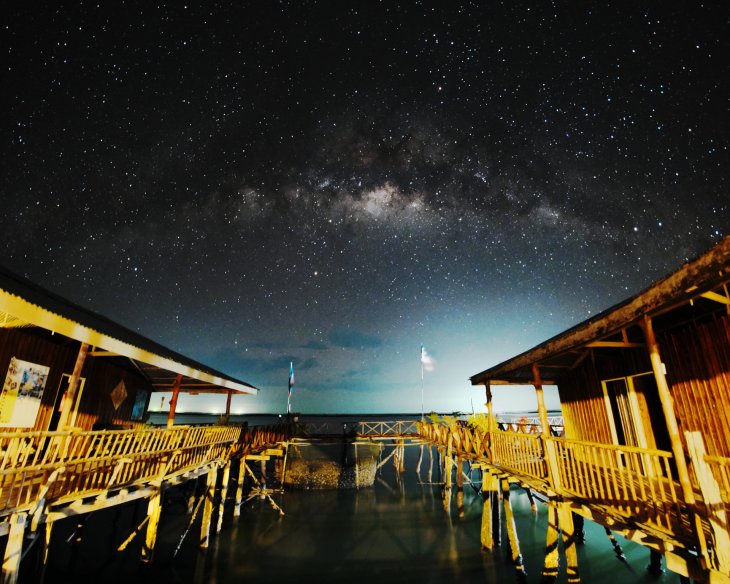
The Lagoon of Stars
At about 4am, I was woken up by a commotion caused by the power generator failure – blackout!
Suddenly the entire place became very dark and I could see a lot more stars. Even the Milky Way was visible to the naked eyes! My first time actually seeing the billions of stars and it was an exhilarating moment.
Tebah Batang Ruby Lagoon is indeed the Lagoon of Stars!
Stargazing in Sabah
If you’re interested to visit Sabah to stargaze and hunt for the Milky Way but do not wish to travel all the way to Lahad Datu then check out this Stargazing & Milky Way in Sabah itinerary that includes proper accommodation and does not require camping. This is an interesting itinerary because you’ll be able to see the dark skies at the beach(Tempurung Golden Beach Resort), in the mountain(Hounon Ridge Farmstay) and next to a river(Tambatuon Homestead)!
It’s been ten years since I created this blog. Despite not having written any article since then, WordPress has continued to maintain this space and my account. Thank you.
Now that I re-discover this space, I’ll try to write an article at least every month. For a start, I’ll write about travel and photography. Since 2008, I travelled quite a bit and started a travel blog – Going Places, maybe I can use ideas from there to add more content to this blog e.g. talked about my travel experience on Hokkaido, Mongolia, Norway, Sweden, Alaska and etc.
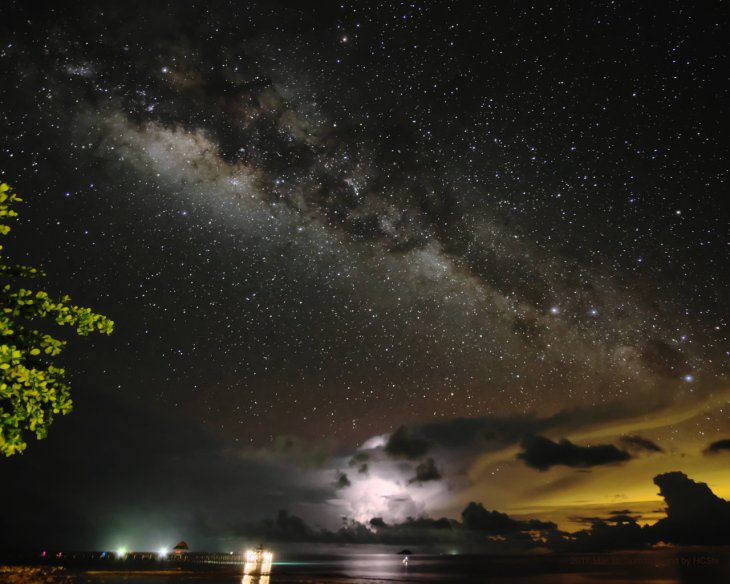
As for photography, I recently started taking pictures of the night sky, in particular, the Milky Way. In order to take photo of the Milky Way, I’ll have to travel to places with little or no light pollution and hope for clear sky with no moon. After taking the shot, for a newbie to astrophotograpy, it’s always challenging when it comes to processing the images to bring out the colors of the billion stars!
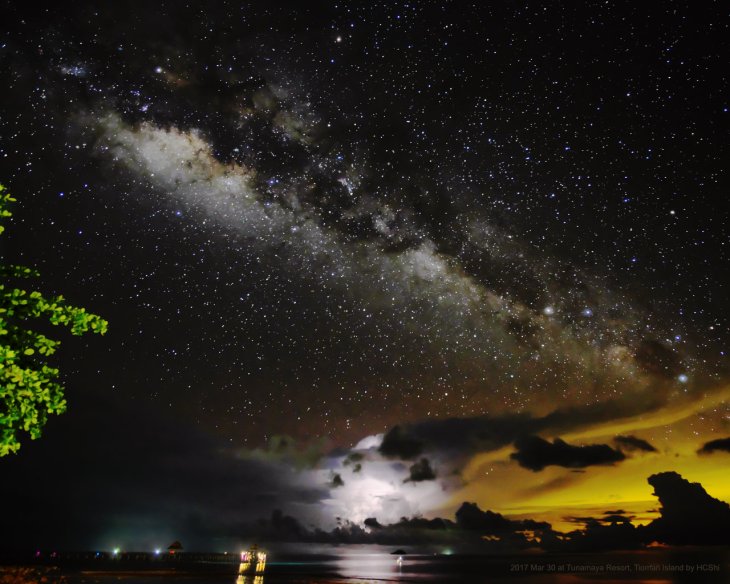
One of my very first Milky Way shots. Lightning over Mersing viewed from Tunamaya Resort, Tioman Island on 30 Mar 2017


You must be logged in to post a comment.